So....today I'm thinking about our half bath makeover.....do any of you have one of these little guys tucked away somewhere in your house? Well....we do....and like most things "tucked away" it didn't get much attention for a LONG time!! And let me tell you....whoever originally decorated this baby.....well....I guess I'll be nice and just say.....we do not have the same taste :)
When you get right down to it.....there really isn't much to talk about on the "Before"......but if I didn't share it with you, then you couldn't really appreciate the "After"......right?? So.....
On the upside of the "Before".......there was a very nice pedestal sink in there and cabinets above the toilet that match the rest of the house.....yep......that's about it on the good side........
On the downside of the "Before".......the walls were covered with hideous wallpaper......geez I so wish that I had a close up of this stuff......it was made to look like a bunch of newspapers were pasted together.......yep.......IT WAS BAD!! Also the fixtures were pretty outdated......lovely silver and gold.....
And.....here is the "Before".....
I know the picture is not that good......but.....well......I didn't have much to work with......and this room is REALLY hard to photograph.....
So.....let's get on to the good stuff......first we had to come up with a plan of attack.....
The hubs did some research and decided that we could paint over the wallpaper......hmmmmm.....have any of you guys tried this technique? In our case the wallpaper was stuck pretty well to the wall.....so we figured it would be hard to get off.....and we were determined to make this a total DIY job!
Well....at least we thought it was stuck well.....but when we looked really close....you could see a few places where the wallpaper was pealing......so can't paint over that......but we were already set on this plan......so we trudged ahead......
The hubs did some more research and found that we needed to do the following in order to paint over the wallpaper......
1. Peel off all loose wallpaper
2. Apply "mud" over the areas where wallpaper was removed
3. Put "mud" over all wallpaper seems
4. Sand down all "mudded" areas until you have a smooth surface again
5. Paint over everything with a oil based primer (can't use water based due to solubility issues with wallpaper glue)
6. Paint with your color of choice
Sounds like a lot of stuff....huh......well.....we still thought it was faster than trying to peel off a million little pieces of wallpaper!
Ok.....so that takes care of the paint.....btw......we used Vast Desert Behr paint with Primer.....
And we ended up with this.....
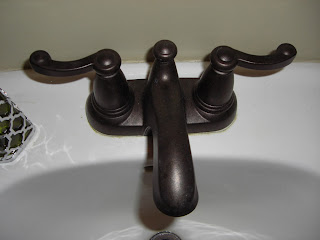
Yahoo!! Things were looking better already!! Next we decided to address the fixtures.....I am a REALLY lucky woman, because my husband is very resourceful!! He changed out the faucet on the sink and took down/put back up the light fixture! BABE -- YOU ROCK!!
So we ended up with this (faucet from Lowe's)....
And I made over the existing light fixture with some ORB spray paint and a couple of new globes from Lowe's.....WOW.....what a difference a little spray paint can make!!
We also decided to turn the fixture upside down......why?.....well......turning the bulbs toward the ceiling really warmed up the light in this space.....
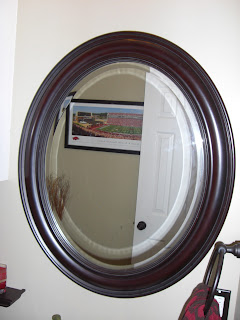
We also replaced the mirror in this space with a big chunky one.....I love picture frames, mirrors, molding, etc.....with big chunky frames!!
AND.....this is a half bath.....so....in my opinion.....it's a place where you can also have a little fun and show some of your personality.....
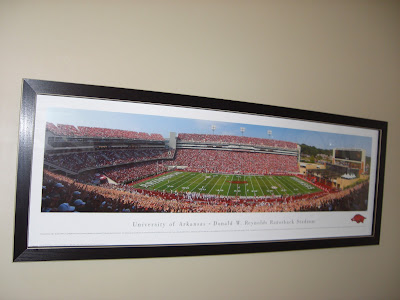
So we decided to add a little Arkansas Razorback love!! Our friends gave us this awesome picture for Christmas last year and it fit perfectly in this space.....
It is a full picture of the Razorback Football Stadium in Fayetteville.....ahhhhh.....reminds us of home :)
We loved it so much that we decided to add a little more Hog flare on the other side of the room....
And here's an up close look at some of the accents in the room.....
The brown and red hand towels are from World Market, the brown hand towels with red stripes are from Target, the picture frame came from Hobby Lobby, and the "vase" came from Target.
The little shelf that the picture frame is sitting on was a spray paint makeover.....it was a shelf that was collecting dust in a closet b/c I didn't like the color.....so I just use my trusty ORB Rustoleum spray paint to quickly make it over......did I mention I love spray paint.....oh yeah.....I guess I did!!
And here's a look at the last two additions.....
And a rug to warm up the floor a little bit.....
The candle holder and the rug are both from Target.....
So.....we were so happy with how it all turned out.....the best part.....this was a one weekend project!! AND it just looks SO different......so warm......
I'm sure we may add this or that to this room later, but for now we are calling it DONE!
So what about you guys.....anyone thinking of tackling a bathroom makeover.....are you going small.....like our little makeover......or are you thinking big......like a gut job? I'd love to hear what you guys are working on!!
Until next time......
XOXO,
Kristal
I'm linking up here.....


12 comments:
Thanks for the credit! It was a good quick project that turned out great!
Omigosh! What a cute little bathroom!! I am doing my kid's bathroom over - making it look a little more "grown up". We have a guy who is going to give the walls a knockdown texture after peeling off the wallpaper. Haven't decided on the color yet - but probably a nice neutral. Love the accents you chose - good job!
You did a really good job. I do not envy you having to strip wallpaper, that is a horribly un-fun job!
So what is ORB spray paint? Could I use it to paint my brass light fixtures that I don't like but can't afford to replace??
What a wonderful job you and your husband did. Looks fabulous.
Best,
Gloria
p.s. I am too lazy to sign in right now. I have the little red house with the white porch blog, I will visit again soon.
gloria.vincent(at)yahoo.com
I've been searching in google for some new ideas and occasionally found your engineeringlifeandstyle.blogspot.com web site. You truly can write and teach and inspire. Keep writing - I'll keep reading.
Anonymous-
Thank you SO much!! Your comment made my day :)
Kristal
The whole room looks super! I particularly love the light fixture - turned out great!
Peggy-
Thanks SO much!! It was a great weekend project and turned out pretty cute :)
Kristal
I found you through the Spring Fling party at Thrifty Decor Chick. I love the updated bathroom. I did a few things to mine about two years ago and love it and now we're working on the master bath.
I also love the razorback picture!! If I could get one of the baseball diamond, that would be even better for my house! :)
Misti-
Thanks SO much!! What all did you do to your bathroom? We are also working on our Master Bathroom now...whew....what a lot of work!!
So...are you a Razorback too? We are crazy fans here :)
Kristal
You have a flare for bathroom makeover! I commend you for transforming that old bathroom of yours into a welcoming one. Your spray paint projects, particularly the light fixture, are pretty amazing. You have some cool color accent, too! Have you done more spray paint projects after this?
Mathew Bergeron
I really loved reading your blog. It was very well authored and easy to understand. Unlike additional blogs, I have read which are not that good. I also found your posts very interesting.
Curtains
Post a Comment